Friday, April 30, 2021

Digital Art - Boss Monster #4


With all prior design choices having been made (with only minor changes), I moved on to the final render of my boss monster. 

The rendering process was mainly spent ensuring that contrast within the render was strong enough that each part was readable. I’d decided that the majority of the monster was going to be this light cream colour so it’d be very easy for it to get muddy in shadow areas and for the highlights to completely over expose it. Having very defined hard edges definitely helped in keep the light shapes comprehensible and keeping strong highlights to a minimum did make for a better final look. No harsh rim lights in this render.

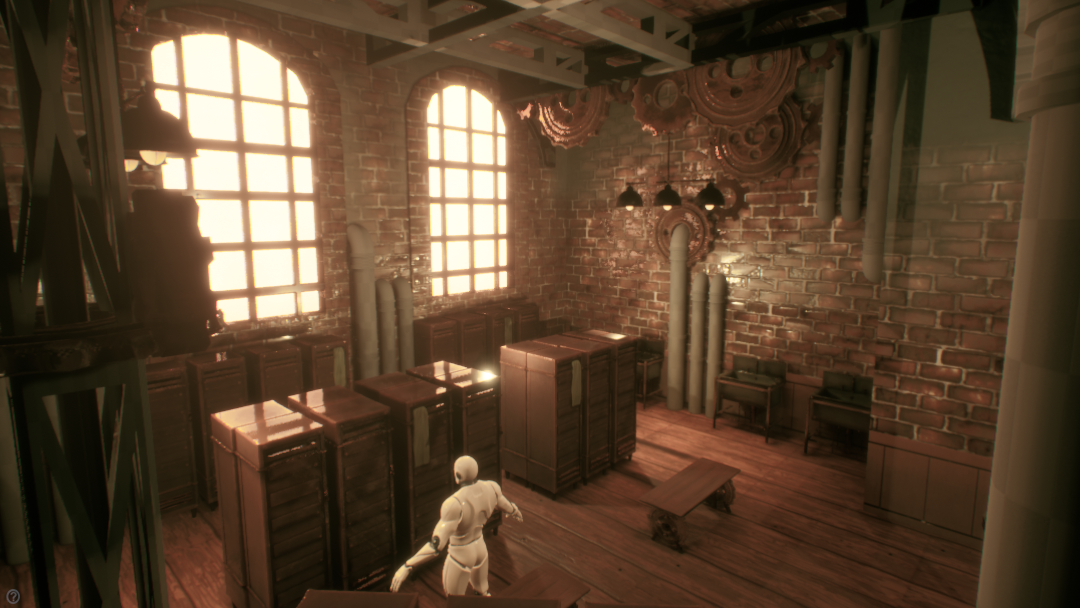
I referred back a lot to my arena to make sure I was mirroring the details of the space within the design well enough but also not overloading the boss too much. There was a bit of experimenting when rendering of whether or not to completely copy something from the arena or copy but adapt it slightly. For example, on the banners around the boss’ head, I wasn’t going to have the diamond design on it like the banners in the arena, instead I was going to have it be a circle. I decided against this because I felt it would kind of disconnect the boss form the environment a bit which wasn’t what I wanted. Even though the circles on the banner didn’t look bad on the monster, it just wouldn’t fit with the environment and felt too separate so I changed it to the same banner design, which worked much better. 

Overall, I’m quite happy with this final character render. I spent quite a lot of time keeping it clean which I felt worked to my benefit and made a very visually appealing piece of concept art. The added back view was a challenge since these were slightly abnormal shapes but it did look good in the end and as a functional piece I think it would make sense if I handed it over to a 3D artist to make. I think the boss monster is effective in what it needs to do and I’m pleased with the result.


Digital Art - Boss Monster #3

 My development of my boss monster continued through sketches based off the silhouette I’d chosen. I decided to take varying approaches to these development sketches, seeing what details worked and showed the right amount of intimidation that a boss monster should have with the added referrals back to the throne room arena I’d made.

I tried creating the sketches with varying degrees of humanoid elements to them (not counting the overall basic shapes). My first design was more robotic in a way, looking kind of like a living suit of armour, and I paid attention to where I should break up the body plates and the scale of parts as to not look too clunky. The second design was more abstract in that I had put a human heart as a head and an eyeball in the centre of the chest area. This design I felt was most intimidating but I was unsure if it would fit with the throne room’s colour scheme and overall appearance. The third design was the most human with an actual head and torso and fairly simplistic design choices compared to the other two. However, I felt that design was a bit safe in that the character read as though he might help you rather than fight you.


Thinking this through I decided to use the first design going forward for my final render. I thought it best fit the environment and almost looked as though he could be part of the environment itself which was kind of the narrative I was going for with this monster. From this I created some simple colour scheme variations. The colour scheme was basically already planned since I wanted it to match with the throne room arena but I did want to experiment with colours like black/dark grey and slightly darker blues to see if it added to the monster feel overall.


Digital Art - Boss Monster #2


Continuing with my boss monster, I created some basic silhouettes playing around with humanoid shapes and attributes to see what could be immediately visually interesting but also still radiate a kind of angelic power. Going along with the idea of creating a somewhat biblically accurate angel, I thought about how to breakup things like arms, hands, etc, to make them more inhuman whilst still being recognizable. This mainly included breaking up the monster into parts, giving some of the silhouettes an almost robotic appearance to them. 

Some silhouettes were much more abstract just for the sake of trying it out in case I liked it. But I decided that the third silhouette would be the one I develop further. I felt that this silhouette I could experiment with quite a bit more on things like the floating parts near the head, what objects contributed to that head shape, etc, whereas the others were a bit more limiting since it felt like there was only one option for certain parts of the other silhouettes.


Digital Art - Boss Monster #1


Starting my boss monster design was fairly simply as this was in partnership with the boss battle arena I’d just made. I knew immediately I wanted the boss to feel as though it was one with the environment you fight them in. I wanted to take the angle of the boss being a corrupted monarch that gained angelic powers and ascended- so immediately from that I wanted aspects of the environment to be reflected in the boss’s design. 

I created a moodboard, mainly drawing inspiration towards games like Bayonetta that have extreme angelic designs for some of their monsters. I wanted to draw upon the kind of details they put into their bosses and imitate that in mind. I also knew I wanted my boss to be in a humanoid shape so that it fits better within the throne room arena. I felt that if I went more along the animalistic route it would clash with some of the design choices that I’d made for the arena- humanoid was just a safer bet.


Digital Art - Boss Arena #6


After spending quite some time rendering, I felt it was safe to call my final render complete.

I spent quite a lot of time when adding colour making sure that everything had good enough readability within the scene. As the colour scheme I had chosen was quite muted for the majority of it, it was very easy for parts like the walls and the columns to blend together and look like one object. Getting the right amount of contrast without it being too overwhelming was a difficult balance but I think overall it worked out in the end.

With the rendering style being stylized and simplistic to a degree, it was also a bit challenging to get different materials to read as what they were like gold, marble, tone, etc. I feel as though I might have had an easier time if I were rendering in a more realistic style but I was committed to the stylization so it was a challenge I had to over come. Adding overlay layers with slight airbrushing in certain areas helped in this case to some vary surface values to different materials, getting them to read better.

Overall though I like how the final render came out, especially at the throne with the rocks and chains. In future I’d probably change the image resolution a bit and make it more widescreen so you get a bigger scope of the area or, alternatively, add alongside an aerial point of view of the whole stage so that you can get a better understanding that the room is a complete circle and it’s mirrored all around. This was good practice of my approach to painting bigger environments and I know which areas now to focus more in future to improve.


Digital Art - Boss Arena #5


Progressing with my boss battle arena, I sketched over my 3D blockout with all the key details and assets for my scene. This was things like window details, banners and drapery, decorative weaponry, etc. I referred back to my initial moodboard quite a bit when sketching to ensure that my design work somewhat made sense and the shapes didn’t feel impossible to make. It was at this point that all of the major decisions were made in terms of arrangement of objects and lighting so what I needed to do when rendering was very clear in my mind. 

I’d considered not really creating this lineart-sketch initially and instead kind of doing it as I went along but I decided against that, mainly because I felt that could get messier down the line and it would be harder to make any necessary changes that way. Also there would be a risk that the room wouldn’t feel very cohesive if I approached different areas at different times. This sketch over I felt was key to getting a good balance and harmony overall and it’d be much easier going forward applying colours and referring back to details within the space.


Digital Art - Boss Arena #4


Before beginning my final render, I created a simple 3D blockout of the shape of my environment. I used mainly basic primitives without really incorporating in much detail (as some aspects of the final stage I was a bit unsure of) but had enough information that I knew where the major aspects of the scene would be. I’d planned for my final render to be from the perspective of the player so when blocking out in 3D, I scaled everything according to that.

Doing this was much quicker than spending masses amounts of time trying to get the perspective correct manually, having 3D as an additional tool in the pipeline definitely helped with getting technical aspects more accurate. I maybe could have gone further with the 3D base and added parts like the drapery I had in my sketch but I still didn’t want to spend too long making this since this was a 2D project, not a 3D one. I’d planned for my final render to be in a stylized look so having the blockout as just basic shapes was enough since stylization would be painted on top anyway.


Digital Art - Boss Arena #3


I’d started creating some development sketches for my boss arena, focusing on the flow of the room and where major assets would go. I’d decided from these sketches to create a circular room rather than a rectangular one to kind of imitate a halo, referring back to the angelic aspect of the room. 

These sketches helped me identify what areas I should keep emptier and where I can afford to make things more cluttered. I kept in mind as I was sketching “what would be annoying for the player to move around” and that helped me limit what I added to the overall scene. It was mainly a case of keeping the main floor area clear and having archways all along the edges to provide some depth variation. Coupling this with some starting colour schemes definitely helped me get a clearer idea of how to approach my final render.


Digital Art - Boss Arena #2


I started gathering reference for my throne room arena, particularly trying to find images that would help me create good looking shapes but practical ones. I wanted the room to emanate an angelic atmosphere but still have functional aspects- for example adding pillars and arches in cool shapes for aesthetic but also so that the player can use them as cover in the level.

I also noted from my reference what kind of colours worked best in this type of environment. I knew that the majority of royal rooms use lots of whites, creams and gold but seeing what accent colours would work well within the scene to add some contrast was also very important.


Digital Art - Boss Arena #1


To start this boss battle arena project, I spent some time coming up with various ideas that I could potentially develop further into a full stage design. I noted down some broad terms like “modern train station” or “grungy sewer” and gathered starting reference to see if I could get an idea of how the level could work in my head. I wanted to take the more action-adventure game route so doing this definitely helped me pin point what areas I could take further and which would probably lead to something not so interesting (in my opinion).

From these starting ideas I landed on the concept of a high fantasy, angelic throne room. I liked this idea because I felt like I could add a lot more storytelling to the room design which could push the design in interesting ways. I could play around with repeating motifs in the scene, important shapes and could have a clear focal point in the room which could be where the boss spawns in or something like that.


Game Production - Group Project #8


After some tweaking, cleaning up the scene and checking in with my group to compare and get feedback, I can call my steampunk locker room finished. This project was challenging in different ways than my previous projects but I felt like I was able to create a decent final result. 

It felt as though there was much more to consider in this project than other ones, mainly because this environment was actually able to be traversed through rather than just looked at from a camera angle. There was much more going back and forth between programs to make alterations to certain assets or textures to make the whole thing cohesive and stick to the theme whilst also being playable. Having to keep in mind that the level needed to run at 60fps minimum meant restricting myself and making changes along the way of what I could add and what I should change to keep the environment interesting but functional.

I think I handled my lighting quite well for this environment. Figuring out how to create fake window light took quite a bit of trial and error but getting there in the end made it very worthwhile. It’s becoming easier to showcase things in Unreal-I know how to manipulate materials better to get them to suit the lighting, and vice versa, which is proving to be a handy skill. Naturally some aspects could stand to be improved with this project. My optimization of some meshes could be better and cleaner (topology wise) and I maybe could’ve pushed my textures more to be closer to the realistic style I was aiming to portray. But for what I’ve made I think they work well.

Overall though, I’m fairly happy with my final room. If I had more time on this project I’d like to add more details to the room and further tweak it in areas (like adding more variation to the wooden floor) but I do like how it is as of right now.


Game Production - Group Project #7


As gradually my scene became more populated with finished assets, I began the implementation of my moving effects. 

To create the smoke I looked up many tutorials on how to create something decent looking and ended up following one made for fog but I altered it to be the smoke I intended. I created a panning material that I used in my particle before playing around with size, duration and collisions. The creation of the particle was much easier than I thought it would be and I was quite happy with the result considering I’d not really used the system before. I’d placed the smoke coming from the top of the boiler and had it spread just a bit into the main room as to not obscure fully the assets on the ceiling.


Additionally, I created the rotating gears that are moving on the ceiling and some parts of the wall. This was a bit more complex than the smoke particle because I had to use blueprints. It was a simple motion so I didn’t have to use many nodes but it was a bit daunting to approach since I didn’t know if connecting the wrong thing would just break everything. But the final motion looks good in my opinion so I’m happy with the final result.

Game Production - Group Project #6


When it came to my lighting, I knew I wanted strong ‘outdoor’ light coming in from the windows. But since this room need to be an enclosed interior I had to mimic that as best I could. Unreal has a bit of a habit of making things quite dark so getting the brightness I wanted was a bit of a challenge.

I made part of my window static mesh into an emissive so that it acted as a light. This in itself though didn’t really give the illusion of window light as it just kind of shone globally rather than in a direction like sunlight would. To create the fake directional light (without actually using a directional light) I made a duplicate of the frame in front of the window and added another point light on top of it so it cast a shadow. I set the secondary frame mesh to hidden when in game mode so that the shadows would still be cast but the actual mesh wouldn’t be seen. This gave a better illusion that the sunlight was actually streaming through the window and creating the light marks on the floor.

The rest of the lighting in the scene was fairly simple, just some point lights and spotlights in areas that made sense. I also enhanced the lighting slightly by using the ‘bloom’ setting in the post processing volume. I played around with this setting quite a bit to get a decent balance as I arranged my assets within the scene so that all the assets were still visible and not over exposed whilst the lighting still looked good.


Game Production - Group Project #5


The texturing process for my major assets went fairly smoothly as I had gathered quite a lot of reference beforehand to compare against. Since my group are doing more of a realistic style, having more reference was important to get each asset looking just right. I’d also met with my group prior to check the progress of our rooms and talk about texturing. Although we can’t share assets we all would try to make our assets look somewhat cohesive with each other so that the level flows nicely.

I imported and baked my major assets all at the same time so that I could compare the textures against one other more easily. It’s definitely important for all the textures to be unified- if I did the texturing of each asset at different times I’d run the risk of some assets having completely different styles to each other.

After my first pass of texturing, I did important the models into Unreal just to see if they read well and if I’d need to make any changes in the actual textures or if it could be modified in a material. It was a bit back and forth for some aspects but it was good for me to check instead of just assuming they were okay and waiting till the last minute to realize they weren’t.


Game Production - Group Project #4

 To begin creating my unique assets, I sculpted out the meshes in ZBrush so that I would have decent high poly meshes for baking. The sculpting process was a combination of using the ZModeller tool to create the hard surface details before going in with tools like the clay brush to add small details and imperfections. I knew that some models like the boiler were entirely unique and would only be placed once in the scene so I could be more free with the details I sculpted into it but for other assets like the locker or bench, I had to keep the added details to a minimum since they would be duplicated a lot throughout the scene. They would start to look very off if all the scratches and dents were in the same place in every model.

For added variation I created an additional cloth mesh that I would keep separate from the locker so that I could duplicate that sparingly to add to some lockers in the final scene. I felt that would create for a more interesting look overall than just having all lockers be plain faced. I considered making an additional locker mesh that look more broken and beaten up but I had to keep the timeframe I had for this project in mind and decided not to do it as it’d be over complicating things and would eat up too much time. Having just the cloth would be good enough. 


With these meshes I exported them out of ZBrush to retopologize and unwrap them in order to take them into Substance for baking and texturing. With the tri count though, I had to consider how much topology each mesh got considering they had to fill the room and keep the level running at 60 fps but also that the player would be able to walk right up to the vast majority of them.

 
Their tri counts weren’t enormous but I left them at a considerable amount (for example, the locker is around 2k tris) since they’d need to uphold a certain amount of detail since the player will be able to view them up close and I don’t want them to be obviously low poly. If this environment were just for photo rendering only I maybe could get away with things further away from the camera being lower poly but as most assets are in player eyeshot, I felt this kind of tri count was justified.

Game Production - Group Project #3


As one of the requirements for my room is to have a moving element, I’ve planned to create a smoke effect that moves along the ceiling of the room and, potentially, moving gears to add to the steampunk element.

Since the smoke would be my main natural element in the scene it’d be fairly important to add- it would be a simple particle effect that collides with the ceiling so it doesn’t pass through and somewhat spreads throughout the room. It’d be coming from an old-fashioned boiler within the room but I don’t want the smoke to be too dark and heavy as to not obscure the room completely. Plus, there’s quite a bit of natural light within the scene so I wouldn’t want it to conflict with that either. I feel I’d need to have my final lighting in place before implementing the effect to ensure one doesn’t overpower the other. 

As for moving gears I would want them moving simply in a spinning motion in place, just to elude to the idea that there’s machinery around making things like the lighting, plumbing, etc, were working. I feel like that could add some nice storytelling aspects, but I’d put adding the smoke as my moving effect as my main priority.    

Game Production - Group Project #2


For my steampunk locker room, I started building my room by arranging my flooring and walls. I created a tiling brick texture and a wooden floor texture in Substance Designer to get a starting idea of the colours for the room. I wanted to make sure that the walls and floor were toned back enough so that they weren’t overwhelming to look at and wouldn’t overshadow the assets that would populate the room.

I created some placeholder meshes additionally to get a scope of scale and how the room would feel populated. Having my concept sketch was quite helpful in that I had a better visual of what I would need to change colour wise or layout wise from my initial idea to work better in 3D, but still had a visual of what I should keep to have the environment read as a locker room.  


Game Production - Group Project #1


For the group project, my team agreed on the theme of a steampunk, Victorian factory (that being the artificial element) slowly being taken over by lava (that being the natural element) via some sort of workplace accident. From that, I chose to take room 2 which would be closer to the artificial side since I felt I would be better at creating assets for that style. The room would have minimal natural elements since, across 6 rooms, the build up to fully natural can be more gradual so I’d only incorporate something like smoke or steam into my room. 

I began gathering references for the steampunk style and creating some rough sketches. This theme was a bit challenging to get an idea of how to approach it- the subject of ‘lava filled steampunk factory’ is good in writing but finding the correct approach took quite a bit of thought.


I planned for my room to be the locker room for the factory workers, imagining that the backstory for the room was that the factory owner set it up as the locker room a bit last minute so it still has some machinery left behind in it (Just to make it a bit more visually interesting or else the room would be just lockers). Creating simple concepts definitely helped direct me to what would need to be made first and how to organize the room so that it feels full but still functions as a playable level.


Traditional Art - Aircraft Study #12

  My aircraft thumbnail sketches were created with the aim to sort out composition. The aircraft I’d chosen to draw was quite small in size ...