Thursday, November 26, 2020

Game Production - Backyard #6 (Recap - Pre Formative Feedback)


As my project stands so far, the majority of the main primary assets are all in place in UE4. Besides very minor alterations that may occur during the final polish stages, assets like the tiling textures, door and columns are complete to how I want them.

I have place holder assets for where the secondary models will go like the drainpipe, flower pots(and plants) fence and soil sacks. I also intend to make a trim sheet which will house the texture space for the wood of the fence and the metal of the pipe. These assets aren’t overly complicated to make so shouldn’t take as long as it did to make the door (for example). 

I’ve created my lighting close to what I want my final scene to look like- I’m aiming for a Tuscany, rural style backyard so thought a sunny afternoon lighting scheme would work nicely. Lots of strong, yellow lights.


With the main base set up in UE4 it won’t take much experimentation as it did initially to fit the textures and style of these upcoming assets to my idea- I have a strong basis now of what I need to do and how to achieve it.


Game Production - Backyard #5


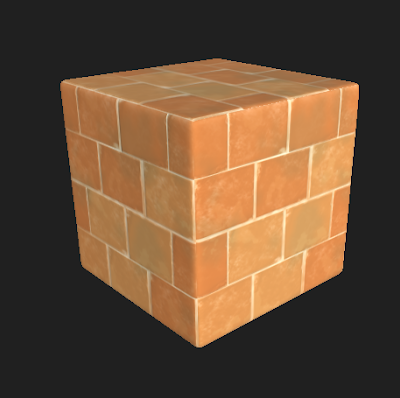
For my tileable textures I used Substance Designer to procedurally create brick, stone and plaster textures. I’d considered using Substance Painter for these and even began create some but being able to make changes according to how things looked in engine was more quicker in Designer than in Painter and it gave a more polished look that I was pleased with.

Getting to grips with the nodes system was a bit confusing at first and I found myself getting lost in my own graphs but by following some tutorials from the Youtube channel “3dEx”, I was able to get a better understanding of what different nodes do and how to use them. I made sure not to follow the tutorials too on the nose however because I wanted my textures to have my own style to them to better match the other assets in the scene.


Game Production - Backyard #4


To start developing my backyard, I began sculpting out the main big objects in my scene- those being the door, stone column and window shutters.

I created a base high poly mesh for each asset in 3DS Max first just to get an understanding of scale and proportions against the rest of my scene before importing them into Zbrush. As I’m aiming for a more stylized take on my final scene I aimed to keep the sculpt fairly clean, adding dents and roughness mainly along the edges in a chunky fashion. This was also a good opportunity for me to get a better understanding of Zbrush and experiment a bit with what tools and brushes would give me a result I was happy with.

As they were fairly simple sculpts they themselves didn’t take too long to do, however moving onto baking and texturing in Substance Painter took quite a bit longer. There was a fair amount of going back and forth between software at this point to alter textures or redo bakes which proved I should spend some more time learning about the full functionalities of Painter. I feel like it may save me some time in the future from unnecessary mistakes and redoing.

Overall though I like how the final meshes came out as a baked low poly and am also very pleased with the high poly sculpts.

Column Sculpt

Door Sculpt

Monday, November 23, 2020

Digital Art - Apocalypse Vehicle #5


With a clearer idea of what I want the final version of my vehicle to look like, I began experimenting with different colour pallets. Because of the location and time period I’d chosen to set the vehicle in, I didn’t want to have a colour scheme too outlandish or else it wouldn’t fit with the world. I stuck to basing my colour schemes on already existing vehicles, balancing the distribution of colours to fit my design better.

Out of the pallets I’ve created I’m leaning more towards having a military look to my final vehicle. It makes sense lore wise and there are also some nice contrasts in vivid vs muted colours that I like and think will work well in a more rendered version.


Digital Art - Apocalypse Vehicle #4


Following from my initial variations, I created more based off one of the three that I’d drawn. This time I played around more with secondary assets to get more range in designs.


Keeping to my theme of it being an insect apocalypse, adding items like rope and ladders to the exterior made sense to the story of the world and proved interesting to the silhouette of the designs.

Digital Art - Apocalypse Vehicle #3

For my apocalyptic vehicle, I created initial variations of what I thought could work for a final design. I’d shifted my focus to nice overall forms rather than details on things like panels and hydraulics. I tried my best in making sure that my vehicle had the essence of a monster truck, which was mainly shown by the wheels, whilst still reading as an ambulance.


I took inspiration from military ambulances mainly for the varying shapes since most standard ambulances are all a basic van shape. It was a bit challenging knowing where to add extruding parts to the vehicle and then how to turn those parts into something that made sense and not just a random box hanging off the side.

Digital Art - Apocalypse Vehicle #1


In order to get an idea of what I wanted to create for my apocalyptic vehicle, I started to think about what type of vehicles would be of use in a situation like that. I found it hard to imagine a vehicle that didn’t have a very relevant purpose so based all my starting ideas on vehicles that would almost be a necessity in a timeline like that. That’s when I landed on the idea of an ambulance.

With an ambulance as my main base vehicle, I began elaborating on the idea by establishing what the time period was, what type of apocalypse the vehicle is in, where in the world it was, etc. This would help me start figuring out what kind of details and practicalities would be important for the vehicle.


I ended up sticking to somewhat modern times(say 5-10 years in the future) in urban Europe. I quite liked the idea of my vehicle being a somewhat crazy enhancement of the kind of ambulances we see today. I also decided that the apocalypse was caused by some mutant insects that can’t fly. Due to the swarm not being able to fly the bugs are always on the ground, so vehicles have altered to be very high off the ground to avoid them. With that idea I decided to mix an ambulance with a monster truck to get the balance of necessity with an oddness that would only work in that kind of scenario.

Digital Art - Apocalypse Vehicle #2


With my moodboards (Real world based and Inspiration) for my apocalyptic vehicle, I stuck closely to the theme I’d previously thought up when looking for images. Obviously there’s value in all images that could help spark ideas for things like wheels, head lights, etc, but I mainly wanted to gain a visual understanding of the complete form of vehicles.

Merging an ambulance and a monster truck isn’t a very easy task and I could easily make it look too ridiculous or impractical if I go way off the margin with how a vehicle is structured. Finding images that gave a good shape read was really important to me to get me started.


Inspiration Moodboard

Real World Moodboard

Sunday, November 15, 2020

Game Production - Backyard #3


After evaluating my backyard scene in 3DS Max, I decided to do a paint over of the block out I’d created. Doing this helped me determine what areas needed to change in the high poly and what details I could implement into the final scene.


The paint over was very rough but it really helped in picking out what areas were working and what weren’t so far. I was using my quick sketch out of my final scene as a reference for my paint over but I’ve now decided to change the middle portion of the scene after seeing it in 3D.


Where I would’ve had the tap and hose as my metallic feature (to fit the brief) I’m going to change it to a pipe and move the drain from the outermost corner to underneath it. I feel like that’ll be a more obvious metallic feature and won’t get lost within the scene as easily. I’m also considering changing the step ladder to an outdoor gardening table because with a step ladder, it might not seem as uniform with the theme so might get shrouded out by the other assets that do work better. That is up for debate though and I’ll see how the scene pans out as I start developing textures and more important assets.


Game Production - Influence Work


As I am striving for that professional look, keeping reference of professional work is something I do very frequently and try to emulate in my own work. An artist I take much inspiration from when it comes to 3D work is Jasmin Habezai-Fekri. She makes incredible stylized environments that are amazingly detailed and satisfying to look at.


A piece of work from her that I admire a lot is ‘Sunny Market Entrance’ which she created using Blender, Zbrush, Substance Painter and Substance Designer. She has documented marginally her process of making this piece and it mainly consisted of working modularly- creating groups of smaller models that she then duplicated and built the major components of the scene out of.


As to the process of creating these modular assets I believe it would’ve been a fairly linear process: creating a low poly version of a model, making a high poly version in Zbrush with more details, baking and then procedurally making textures in Substance Painter. Her texture work is fairly particular in that everything is coloured very lightly. With that I mean there aren’t heavy AO or high amounts of contrast in the details she creates which I think works really well to make the scene overall very easy to look at. I feel as though that is something I can take from her work to keep in mind when creating my own environments.


Game Production - Backyard #2


With my backyard piece, I’ve created a very basic block out of my final scene to establish scale, composition, lighting, etc.

As my scene is based on Tuscany style streets, the scene will be fairly clean in that the walls and objects weren’t be very grungy or broken, maybe some of them old looking at best. It’ll be mainly warm colours used in the textures and I’ll use warm light to compliment that (since Italy is a sunny place generally), perhaps a secondary cooler light coming from another angle to help differentiate objects.


Seeing this I can see which objects will be most prominent (the door and the plants + pots) and which might get lost in the final scene (the tap). I might change things around or change assets completely to balance things out. It’ll take experimenting more in Max to get a better final outlook as I start to create assets in high poly that I’m sure of.


Game Production - Pumpkin Exercise


In this lesson, we had an introduction on Zbrush- we got given a run down on the functions of the program, the interface and how to make a simple sculpt, such as a pumpkin. I’d used Zbrush loosely prior but this was my first time sculpting from scratch so it was slightly tricky getting to grips with manoeuvring around the program.


Sculpting the base of the pumpkin was fairly easy to understand and it was definitely a good exercise to do as practice. It just solidified the basics of using Zbrush well. When it came to adding more details and keeping things neat, I tried my best not to over-complicate things so my pumpkin stayed fairly stylized and simplistic- probably the right way to go about it.


With this I now know how to approach sculpting things in future, especially in regards to my backyard project. I do think I’ll need to play around with Zbrush more and do practice sculpts in my own time just so I’m not lost in where to start whenever I’m faced with a proper task.


Traditional Art - Aircraft Study #12

  My aircraft thumbnail sketches were created with the aim to sort out composition. The aircraft I’d chosen to draw was quite small in size ...